Showing posts with label Remarkable Stamp of the Month Blog Tour. Show all posts

Sunday, October 13, 2013

RemARKable Stamp of the Month Blog Tour!

Hello!  It is the second Sunday of the month, so it's time for another fabulous RemARKable Stampers Blog Tour!  This month we are featuring projects made with two products from the Holiday Mini Catalog:  Harvest of Thanks and Christmas Collectibles. 
 
 
Harvest of Thanks
#131736  Wood Mount  $20.95
#131739  Clear Mount  $15.95

My first creation uses this stamp set along with the Sweater Weather Designer Series Paper. 


I stamped the main image in Cajun Craze ink onto Very Vanilla card stock.  I sponged the edges with Crumb Cake ink to make it look "vintage."  The base of the card is Chocolate Chip with a layer of Cajun Craze, then the layer of Sweater Weather Designer Series Paper.  I used the 1 1/4" Burlap Ribbon, Linen Thread, and Antique Brads to embellish this card.  Perfect for Autumn!
 
I used the Christmas Collectibles Bundle for my other two projects.  You can save 15% when you buy the Christmas Collectibles stamp set and the Christmas Ornament Punch together. 
 
Christmas Collectibles Stamp Set + Christmas Ornament Punch
#133282  Wood Mount  $31.95
#133283  Clear Mount  $27.95
Here is my first project:


I used Cherry Cobbler card stock for the base of the card, then added a layer of Early Espresso that I embossed twice with the Stylish Stripes embossing folder.  Embossing twice gives lets you get a "plaid" look to your card stock.  This is a great idea that one of my customers suggested -- isn't it cute?  I stamped each ornament twice then cut the center section out and layered it on top of the punched ornaments.  Cherry Cobbler twine makes cute bows and ornament hangers, too.  The sentiment is from the Joy to the World Stamp set. 

Joy to the World
#131796  Wood Mount  $21.95
#131799  Clear Mount  $16.95
The final project for today is very, very sparkly.  I'm not sure my photos are able to show how sparkly this card is!


I used the Circle Card Thinlits Die to cut the base of this card in Smoky Slate card stock.  I added sparkle with our Silver Glimmer Paper and the striped paper in the Winter Frost Specialty Designer Series Paper.  What do you think? 

Here is a close-up of the ornament:


I stamped 4 ornaments, punched them out with the Christmas Ornament Punch, then folded them in half lengthwise.  I used our Tombow Liquid Adhesive to glue them together, then adhered them to the Silver Glimmer Paper snowflake die cut with Stampin' Dimensionals.  It was so much fun to make this card!

Well, that's all for me.  Now, it is time to see what Melissa Bollinger has created.  I know it will be Remarkable!  Just click on the graphic below, or go to http://www.stampinup.net/blog/2089191


Nancy Amato           http://stampinallnight.blogspot.com
Melissa Bolinger      http://www.stampinup.net/blog/2089191
Jackie Bottomley     http://www.jackiebottomley.blogspot.com
Susan Carlson         http://stampinmomoffour.blogspot.com
Tamra Davis            http://www.thecardladies.com
Connie Deibler         http://www.conniestamps.com
Sherri Eddleblute      http://www.sweetestdesigns.blogspot.com
Crystal Kondo           http://www.card-ed.com
Deb Lehigh               http://thestampinhut.typepad.com
Anne Matasci            http://www.MauiStamper.wordpress.com
Robin Merriman        http://www.trinitydesignstudio.blogspot.com
Audra Monk              http://thecraftyyogi.blogspot.com
Maria Pane               http://www.stampinandscrappinwithriri.blogspot.com
Andi Potler                http://www.absolutekreations.com
Michele Reynolds     http://www.inspirationink.typepad.com
Pam Staples             http://www.sunnygirlscraps.com
Jeri St. John             https://jerrisgemtastics.blogspot.com
Jeannette Swain       http://www.stampsnwhatnot.com
Janet Wakeland        http://www.remarkablycreated.com

Sunday, September 8, 2013

RemARKable Stamp of the Month Blog Tour!

Hello, and welcome to the RemARKable Stamp of the Month Blog Tour!  Weren't Janet's creations just beautiful?  This month, we are featuring creations using products in the Holiday Mini Catalog:  Magnificent Maple or Halloween Bash.  I chose to feature projects created with the Magnificent Maple stamp. 
Magnificent Maple
#131868  Wood Mount Only  $9.95
This stamp is one of my favorites!  It lends itself well to Autumn-themed cards, and the lines in the image also make it the perfect stamp for a masculine card.

My cards for this blog tour are very easy and perfect for the beginning stamper.  If you are new to stamping, I would recommend this stamp. 

 
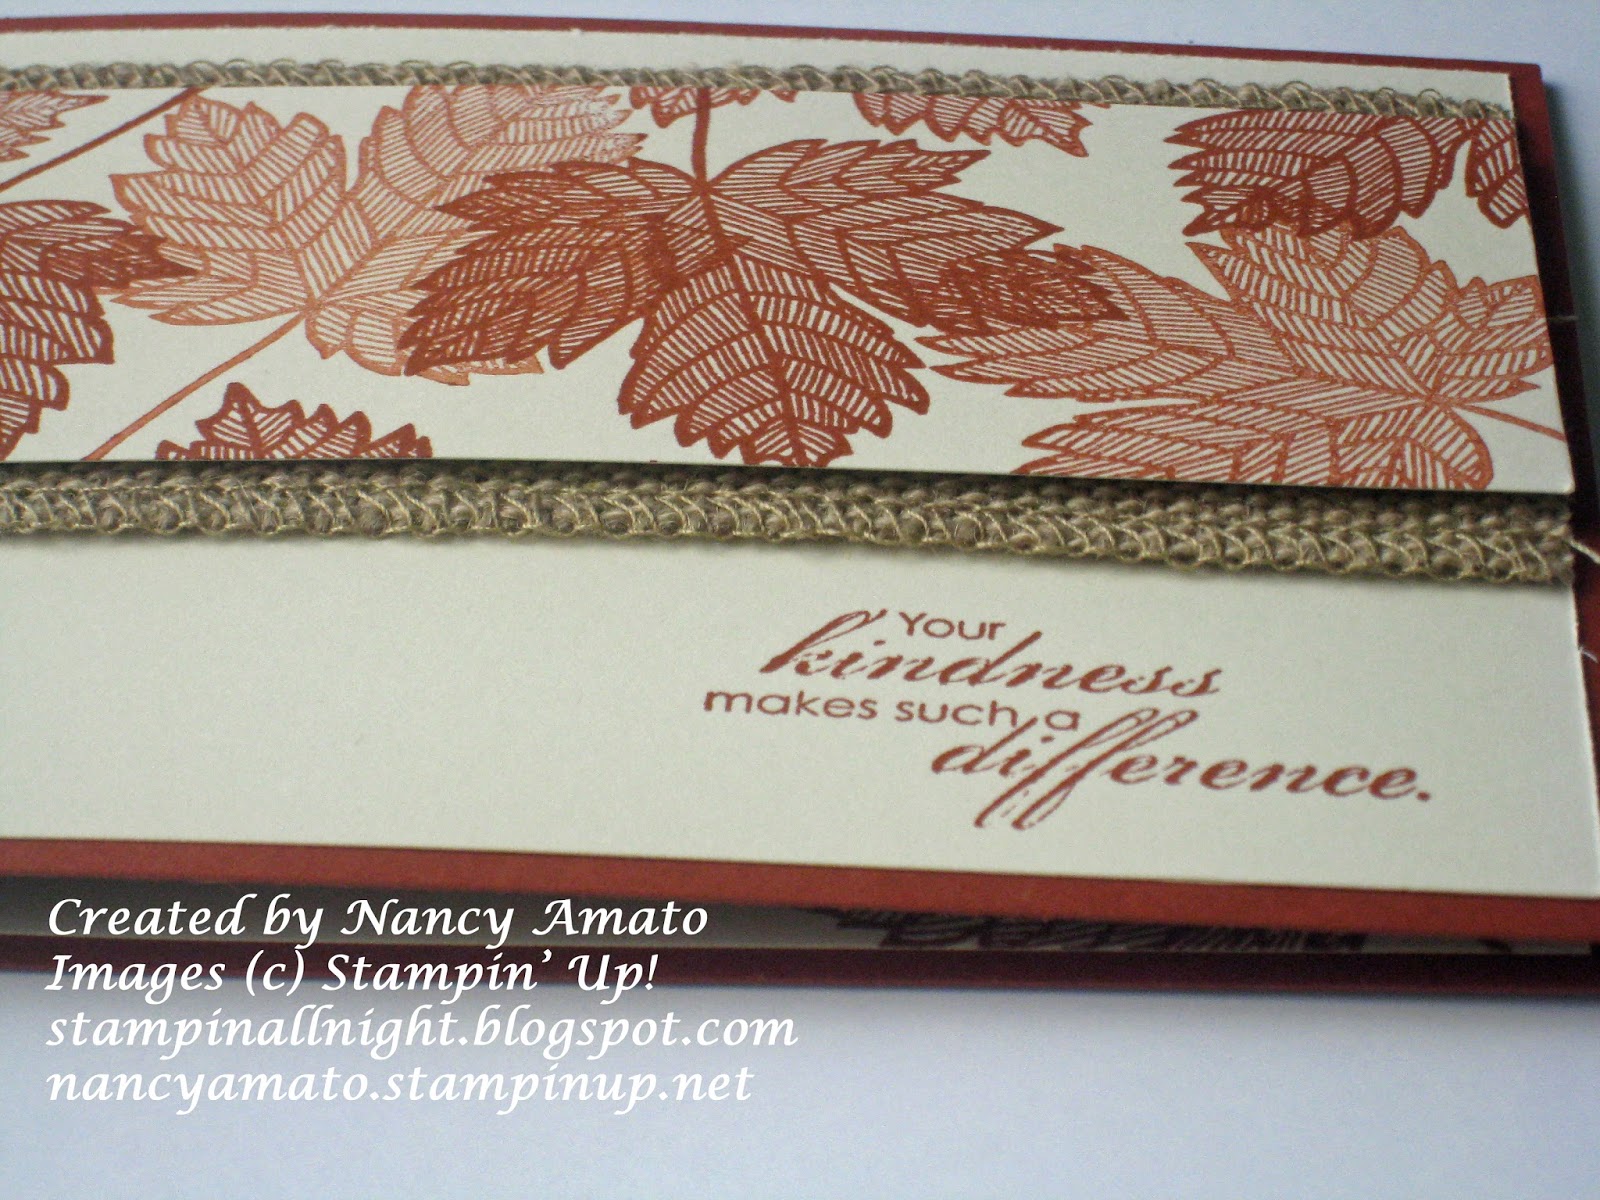
I used Cajun Craze and Very Vanilla card stock to make a simple thank you card.  I stamped the Magnificent Maple image in Cajun Craze ink full strength and also stamped off once to get the lighter version.  I layered the stamped piece on top of two pieces of our "perfect for Autumn" 1 1/4" Burlap Ribbon.  I LOVE the texture of this Burlap Ribbon. 


I attached the Burlap Ribbon to the card front with Sticky Strip, then I used Stampin' Dimensionals to attach the stamped piece to the Burlap Ribbon.  The Stampin' Dimensionals give it a little pop off the front of the card.

My second project is a birthday card that has a masculine feel.  I chose Basic Gray, Whisper White, and Crushed Curry as my color scheme.  The Magnificent Maple is stamped in Crushed Curry, and the birthday greeting is stamped with Basic Gray.


I gave the front of the card a "pinstripe" feel by scoring a vertical line every 1/4" on the front of the card.  Quick and easy card, but so elegant!

My final project also uses the 1 1/4" Burlap Ribbon, but in a different way.  Can you find it?


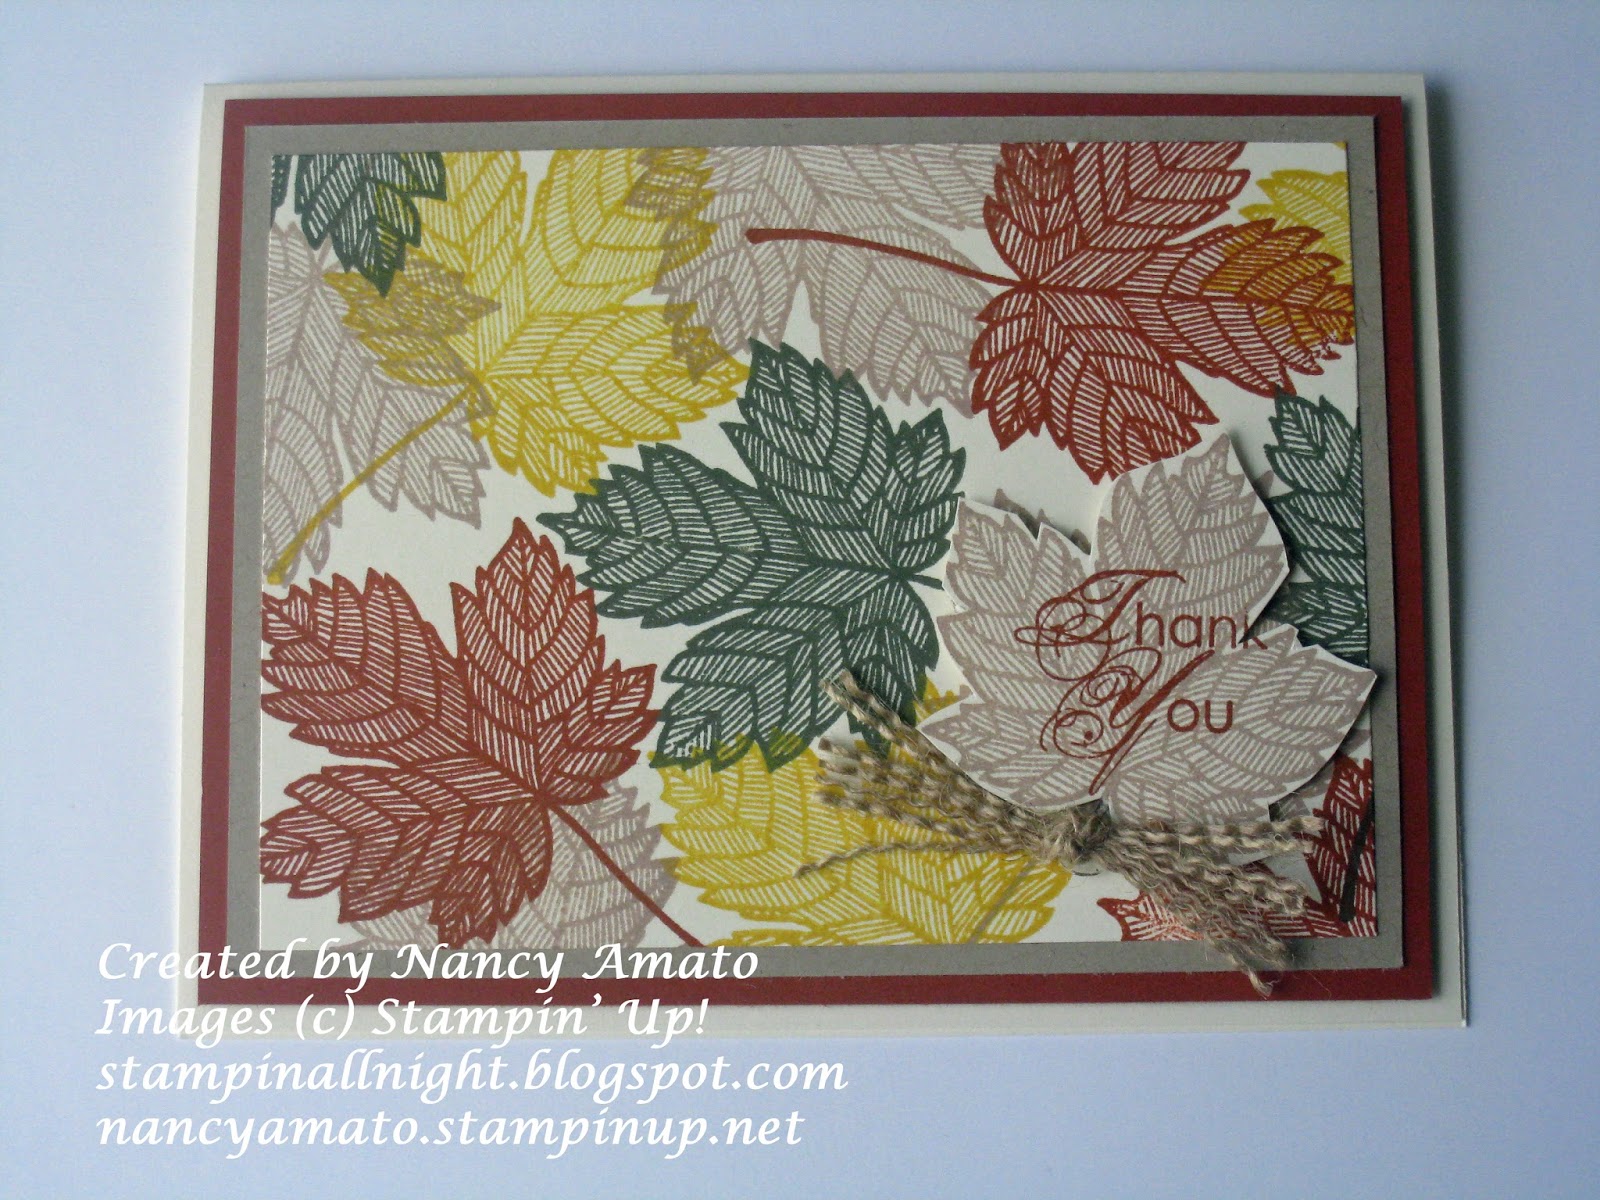
This card features the Magnificent Maple stamp and Crumb Cake, Cajun Craze, Always Artichoke, and Crushed Curry ink.  I stamped in each color to make a background that certainly says "Autumn" to me.  I stamped one maple leaf with Crumb Cake ink and cut it out with my paper snips.  I used Cajun Craze ink to stamp the "Thank You" on this leaf, then I attached it to the front of the card with Stampin' Dimensionals to give it some pop.  Have you found the Burlap Ribbon yet?  Well, here's a hint: 


I cut the edging off of a piece of ribbon and pulled threads from it to make this knot.  I love how the threads are crimped.  I simply gathered some threads together, tied them in a single knot, trimmed the ends and attached it to the base of the leaf with a Mini Glue Dot. 

All of the greetings are from the Blooming With Kindness stamp set.  I hope you enjoyed these projects!  Now it is time to see Melissa Bollinger's beautiful creations.  http://www.stampinup.net/blog/2089191.  Thanks for stopping by!


Here is the complete line-up for the blog tour:
Nancy Amato            http://stampinallnight.blogspot.com  YOU ARE HERE!
Melissa Bolinger      
http://www.stampinup.net/blog/2089191
Jackie Bottomley      http://www.jackiebottomley.blogspot.com
Susan Carlson           http://stampinmomoffour.blogspot.com
Tamra Davis             http://www.thecardladies.com
Connie Deibler         http://www.conniestamps.com
Sherri Eddleblute      http://www.sweetestdesigns.blogspot.com
Crystal Kondo           http://www.card-ed.com
Deb Lehigh               http://thestampinhut.typepad.com
Anne Matasci            http://www.MauiStamper.wordpress.com
Robin Merriman        http://www.trinitydesignstudio.blogspot.com
Audra Monk              http://thecraftyyogi.blogspot.com
Maria Pane                http://www.stampinandscrappinwithriri.blogspot.com
Andi Potler                http://www.absolutekreations.com
Michele Reynolds     http://www.inspirationink.typepad.com
Vicki Soni                  http://www.paperinkle.com
Pam Staples               http://www.sunnygirlscraps.com
Jeri St. John               https://jerrisgemtastics.blogspot.com
Jeannette Swain         http://www.stampsnwhatnot.com
Janet Wakeland         http://www.remarkablycreated.com


Sunday, July 14, 2013

RemARKable Stamp of the Month Blog Tour: Chalk Talk

Hello!  Welcome to another blog tour!  This month's featured stamp set is Chalk Talk.  I purchased this stamp set and the framelits in a bundle and saved 15%!

Wood Mount Catalog #132731  $43.25
Clear Mount Bundle  Catalog #132730  $37.25
My first card uses the "Scribble" technique.  I used the Daffodil Delight, Melon Mambo, and Tangerine Tango Stampin' Write markers to scribble onto a piece of Whisper White card stock.  Next, ink up the I Can't Thank You Enough stamp with StazOn Black ink and stamp it in the center.  I embossed the Daffodil Delight card stock with the new Modern Mosaic embossing folder -- one of my favorite toys from the new catalog!


My second card has more of a vintage feel (big shock, I know -- LOL).  This is one of the cards we made at my Summer Fun class.  The butterfly was heat embossed with Early Espresso embossing powder, then So Saffron ink was applied with a sponge dauber to color in the butterfly wings. 
The For You stamp coordinates with our 1 3/8" Circle Punch and the I'm So Grateful There's You In The World coordinates with our Extra-Large Oval Punch.


My final project is a great tag for lots of things:  gift bags, sweet treats, and cards. 

 
Cutting with framelits is easy-peasy with our new Magnetic Platform.  No more Post-It Notes for this gal now that I have this wonderful tool!
Catalog #130658   $39.95

 
I hope you enjoyed my projects!  Now, it is time to see what Missy has created.  I know it will be fabulous! 


Missy Bolinger
 
Here's the complete line-up of bloggers for this blog tour:

Nancy Amato http://stampinallnight.blogspot.com  YOU ARE HERE

Melissa Bolinger  www.stampinup.net/blog/2089191

Jackie Bottomley   jackiebottomley.blogspot.com

Susan Carlson  http://stampinmomoffour.blogspot.com

Tamra Davis  www.thecardladies.com

Connie Deibler  www.conniestamps.com

Crystal Kondo  www.card-ed.com

Deb Lehigh  http://thestampinhut.typepad.com/

Anne Matasci   www.MauiStamper.wordpress.com

Robin Merriman  http://www.trinitydesignstudio.blogspot.com

Audra Monk  thecraftyyogi.blogspot.com 

Maria Pane  http://www.stampinandscrappinwithriri.blogspot.com

Andi Potler  http://www.absolutekreations.com

Michele Reynolds  http://www.inspirationink.typepad.com

Vicki Soni  www.paperinkle.com

Jeannette Swain  http://www.stampsnwhatnot.com/

Janet Wakeland   www.remarkablycreated.com 


Sunday, April 14, 2013

RemARKable Stamp of the Month: Secret Garden

Hello, and welcome!  I hope you are enjoying the RemARKable Stamp of the Month blog tour.  This month, we are featuring Secret Garden (just in time for Spring!). 

Buy the stamp set and framelits together and SAVE 15%!
Catalog #131099 Clear Mount, $36.95
Catalog # 131100 Wood Mount, $42.95
 
My first card is an Easter card.


I used Tangerine Tango ink and stamped on Daffodil Delight card stock, then used the Secret Garden framelits to cut out the first flower.  The framelits make it easy-peasy to cut out these flowers.  I stamped 2 more flowers on Daffodil Delight card stock with Tangerine Tango ink.  I used my paper snips to cut the smaller inner circle from one and the medium circle from the other one.  I attached a few mini pearls to the center of the flower, then layered it onto the medium flower with a Stampin' Dimensional.  Then, I attached this to the flower base with another Stampin' Dimensional.  (I love Stampin' Dimensionals!  They just give cards that extra pop that makes them look great!)


Here is my second card:

Remember to stamp your envelope for a special touch!

I love Stampin' Dimensionals and Basic Pearls!


Once again, I used Tangerine Tango and Daffodil Delight for the color scheme for this card.  The fun daisies make this Get Well card bright and cheery.  I love how the framelits cut out these flowers -- quick and easy!

My third card is a flower pot card:


This card uses Crumb Cake, Summer Starfruit, Primrose Petals, and Raspberry Ripple.  Unfortunately, I have needed to make several get well cards lately for friends and neighbors.  I hope these cards have brightened their day!  And, I hope you have enjoyed these cards, too.

Thanks for visiting and enjoy your next stop on the tour – Linda Bartolucci - http://www.inkstampandscrap.com/


http://www.inkstampandscrap.com

Wednesday, April 3, 2013

This and That


Your life is: Awesome. Quirky. Exciting. Perfectly messy. And happening really fast. So Stampin' Up! is happy to introduce our newest product line that lets you capture it all on-the-go. This and That will debut in the 2013-2014 annual catalog, but we're giving you the chance to get it now.

This and That is a fun little book that lets you record anything you want.  Ideas for your wedding, a journal of a road trip, your kids' favorite books/food/cartoon characters/funny sayings -- whatever you want it to be.  It is totally up to you!   

And, you can order these products now:
  • Epic Day This and That Journal (131268, $10.95)
  • Epic Day This and That Designer Series Paper (130814, $10.95)
  • Remember This and That Rotary Stamp (130133, $5.95)
  • Epic Day This and That Stickers (131271, $4.95)
  • Epic Day This and That Designer Washi Tape (131269, $4.95) 
Best of all, you can order all of these products in a bundle and save 15% from now until April 30, 2013!  Yay!  (Just use catalog number 133350, $32.08)  The discounted bundle will only be available until April 30th, so order now to save some moolah. 

And, you can enter to win a free trip to San Diego!  Go to http://bit.ly/11kiQmi and LIKE this page on Facebook.  Good Luck!

I will be back soon with photos of fun new projects.  PLUS, this weekend is another RemARKable Stamp of the Month blog tour!  Woohoo!

See you soon!


Sunday, March 10, 2013

RemARKable Stamp of the Month Blog Tour

Hello!  Welcome to the RemARKable Stamp of the Month Blog Tour.  This month's stamp set is "Ciao, Baby!" The images in this stamp set are the perfect size for the Petite Curly Label punch that you can get FREE during Sale-A-Bration with an order of $50 (before tax and shipping).  But, hurry -- Sale-A-Bration ends on March 22, 2013.  The 7/8" Scallop Circle punch is also perfect for this stamp set.
129645  $17.95  Wood Mount
129648  $13.95  Clear Mount
I made two cards -- one using the 7/8" Scallop Circle punch and one using the Petite Curly Label punch.  I got the inspiration for my first card from a gift bag I purchased at Target. 

This gift bag coordinates perfectly with Chocolate Chip, Bashful Blue, Certainly Celery, and Whisper White!
Here's the card I made:


Close-up of the stamped image and lots of layers assembled with Stampin' Dimensionals!
I love layering with Stampin' Dimensionals, don't you?
 
I stamped the "Oh, baby" stamp with Bashful Blue ink onto Whisper White card stock and used the 7/8" Scallop Circle punch to punch it out.  Then, I pulled out some Stampin' Dimensionals and went to town on these layers!  I used the 1" Circle punch, 1 1/4" Scallop Circle punch, 1 3/8" Circle punch, 1 3/4" Scallop Circle punch, and 2 3/8" Scallop Circle punch for the layers. 
 
I used the 3/4" Circle punch, 1" Circle punch, and the 1 1/4" Circle punch and Bashful Blue, Certainly Celery, and Chocolate Chip card stock to punch circles for the background.  Our Chocolate Chip 1/2" Scallop Dots Ribbon is the perfect touch and ties all of the elements together. 
 
I was even a little "circle-happy" on the inside of the card:
 
Inside verse is from "Petite Pairs" stamp set.
Here are the supplies I used for this card:
Stamps:
Ciao, Baby!
Petite Pairs
Paper:
Whisper White
Chocolate Chip
Bashful Blue
Certainly Celery
Ink:
Bashful Blue
Chocolate Chip
Accessories:
Stampin' Dimensionals
Chocolate Chip 1/2" Scallop Dots Ribbon
3/4" Circle Punch
1" Circle Punch
1 1/4" Circle Punch
1 3/8" Circle Punch
7/8" Scallop Circle Punch
1 1/4" Scallop Circle Punch
1 3/4" Scallop Circle Punch
2 3/8" Scallop Circle Punch
2-Way Glue Pen
 
I just love the Petite Curly Label punch, so I wanted to use it for my second card. Doesn't it coordinate nicely with our Curly Label punch?  Remember, this punch is FREE during Sale-A-Bration!   
This card also features stamps from "A Fitting Occasion", "Oh, Hello", and "A Word For You" stamp sets. 
Here's a peek of the inside:


Here are the supplies I used for this card:
Stamps:
Ciao, Baby!
Oh, Hello
A Word For You
Paper:
Real Red
Daffodil Delight
Pacific Point
Whisper White
Ink:
Real Red
Daffodil Delight
Pacific Point
Accessories:
Chevron Embossing Folder
Ovals Collection Framelits
Curly Label Punch
Petite Curly Label Punch
Small Heart Punch
Typeset Alphabet Bigz Dies
Daffoldil Delight 1 1/2" Seam Binding Ribbon
Pacific Point 1/4" Stitched Grosgrain Ribbon
Stampin' Dimensionals
2-Way Glue Pen

Well, I hope you enjoyed these cards.  Now, click the link below to visit Linda's blog and see what she has created!


Linda Bartolucci - http://www.inkstampandscrap.com/

Friday, March 8, 2013

It's almost time for another RemARKable Stamp of the Month Blog Tour

Hello!  This weekend is another RemARKable Stamp of the Month Blog Tour.  We will be creating projects with the "Ciao, Baby!" stamp set. 


Ciao, Baby!
129645, $17.95 wood mount
129648, $13.95 clear mount
(also available in Spanish & French)
Be sure to stop back on Sunday, March 10, to see some fabulous projects from RemARKable stampers across the US.  I will see you then!

Sunday, February 10, 2013

RemARKable Stamp of the Month: Collage Curios

Welcome to another RemARKable Stamp of the Month blog tour!  This month's stamp set is Collage Curios, a new stamp set that is available in the Occasions Mini Catalog on page 24.


Collage Curios
129099 $20.95 Wood Mount
129102 $15.95 Clear Mount

This stamp set coordinates with our 1" circle punch, 3/4" circle punch, 1/2" circle punch, and the new 7/8" scallop circle punch (see page 16 of the Occasions Mini Catalog) .

My first project is a vintage-style card featuring the script stamp and the butterfly stamp.  I wanted to make this card look old, and sponging with Crumb Cake ink is a quick and easy way to get that vintage look. 


I used the Natural 7/16" Trim Ribbon to make a ruffly-circle to back the stamped images.  Here is a close-up of the stamped  images:


I pulled 2 threads close to one edge of the ribbon to make it gather into a "ruffle."  I used a little Tombow Multipurpose adhesive to glue the two ends together.  What do you think?  Here are the supplies I used for this card:

Stamps:
Collage Curios
Teeny Tiny Wishes
Paper:
Naturals Ivory
Soft Suede
First Edition Designer Series Paper
Ink:
Soft Suede
Crumb Cake
Accessories:
Linen Thread
Natural 7/16" Trim Ribbon
Square Lattice Folder
Word Window punch
Modern Label punch
3/4" Circle punch
1" Circle punch
1 1/4" Circle punch
Stampin' Sponge
Stampin' Dimensionals
Tombow Multipurpose Adhesive


My second card is inspired by my new little nephew!  I became an aunt again a few days ago, and I made this special card just for him.  I cannot wait to give it to the new little guy and his happy mom, dad, and big sister! 

 
I stamped the hot air balloon in Real Red ink directly onto a piece of Summer Smooches Designer Series Paper.  I punched it out with the 3/4" Circle punch and used Stampin' Dimensionals to layer it onto a 1" Circle punch out of another piece of designer series paper.  I used one of our new Soda Pop Tops as the "O" in BOY.  Here is a closer look:
 

Here are the supplies I used to make this card:

Stamps:
Collage Curios
Teeny Tiny Wishes
Paper:
Summer Smooches Designer Series Paper
Whisper White
Daffodil Delight
Island Indigo
Ink:
Real Red
Island Indigo
Accessories:
Hearts A Flutter framelits
Ovals Collection framelits
Occasions Paper Piercing Pack
Paper Piercing Tool
Stampin' Pierce Mat
1" Circle punch
3/4" Circle punch
Word Window punch
Modern Label punch
Soda Pop Tops
Chevron embossing folder
Typeset Alphabet Bigz dies
Real Red 1/8" Taffeta Ribbon
Mini Glue Dots
Stampin' Dimensionals
Sticky Strip (use 2 small strips of Sticky Strip on the back of the Soda Pop Top to attach it to the card)

I hope you enjoyed my cards!  Just click on the icon to go to the next stop on the blog tour, Linda Bartolucci's blog.  And, be sure to come back next week for a RemARKAble blog tour featuring the Best of Birthdays stamp set.  See you then!


Here is a list of all of the links for the blog tour: